So you’ve decided to take your kayak fishing skills to the next level and install a fish finder on your trusty vessel. Well, you’re in luck! In this step-by-step tutorial, we’ll walk you through the entire process of installing a fish finder on your kayak. From gathering the necessary tools and materials to mounting the transducer and wiring everything up, we’ve got you covered. By the end of this tutorial, you’ll be ready to hit the water with your newly equipped fishing buddy. Let’s get started!
Choosing the Right Fish Finder
When it comes to choosing the right fish finder for your kayak, there are a few factors to consider. The size of your kayak is one of the most important considerations. You’ll want to make sure the fish finder you choose is compatible with the size and weight of your kayak. A larger fish finder may not be suitable for a smaller kayak, as it could create an imbalance and make your kayak unstable on the water. On the other hand, a smaller fish finder may not provide the functionality and features you desire if you have a larger kayak. So, be sure to consider the size of your kayak before making a decision.
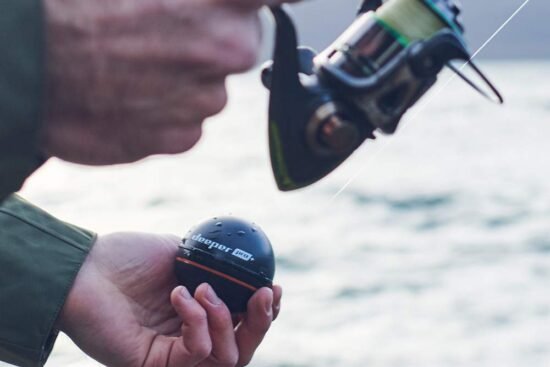
Another factor to consider is the type of fish finder you want. There are various types available, including handheld fish finders, GPS fish finders, and combo units that combine fish finding capabilities with GPS navigation. Handheld fish finders are great for those who want the flexibility to easily move the fish finder from one kayak to another. GPS fish finders provide the added benefit of navigation and mapping features, allowing you to mark waypoints and easily find your way back to fishing hotspots. Combo units offer the best of both worlds, but they tend to be larger and more expensive. So, decide on the type of fish finder that best suits your needs and preferences.
Of course, budget is always an important consideration. Fish finders can range in price from as low as $100 to several hundred dollars. It’s essential to determine your budget before starting your search for the right fish finder. By setting a budget, you can narrow down your options and focus on fish finders that fall within your price range. While it’s tempting to go for the most expensive model with all the bells and whistles, it’s important to find a fish finder that offers the necessary features and functionality you need without breaking the bank.
Lastly, it’s crucial to check the compatibility of the fish finder with your kayak. Some fish finders may require specific mounting options that may not be suitable for your kayak. Before purchasing a fish finder, make sure it’s compatible with your kayak’s mounting options. Additionally, consider the power requirements and ensure that your kayak has sufficient battery capacity to power the fish finder. Compatibility is key to ensuring a successful installation and optimal performance of your fish finder.
Gathering the Necessary Tools and Materials
Once you have chosen the right fish finder for your kayak, it’s time to gather the necessary tools and materials for the installation process. Here’s a list of items you’ll need:
-
Fish Finder Unit: This is the main component of your fish finder system. It typically consists of the display screen and the control panel. Select a fish finder unit that is durable, waterproof, and has features that meet your angling needs.
-
Transducer: The transducer is responsible for sending and receiving sonar signals to detect fish and underwater structures. It is a crucial part of the fish finder system. Choose a transducer that is compatible with your fish finder unit and offers the desired frequency range and beam angle for your fishing preferences.
-
Battery and Battery Box: A reliable power source is essential for your fish finder to operate. Depending on the power requirements of your fish finder, choose a suitable battery and battery box that can provide sufficient power for your fishing trips.
-
Mounting Hardware: To securely mount the fish finder and transducer to your kayak, you’ll need appropriate mounting hardware. This may include mounting brackets, screws, nuts, and bolts. Make sure the mounting hardware is compatible with your kayak and provides a secure and stable installation.
-
Wiring and Connectors: Adequate wiring and connectors are necessary for connecting the fish finder unit, transducer, and battery together. It’s important to choose high-quality wiring and connectors that are waterproof and can withstand the outdoor elements.
-
Tools: To properly install the fish finder system, you’ll need a few tools such as a drill, screws, wrenches, and pliers. These tools will help you mount the fish finder and transducer, drill holes, and secure the wiring. Make sure you have the necessary tools on hand before starting the installation process.
Preparing Your Kayak
Before you can start mounting the fish finder on your kayak, there are a few preparations you need to make. Here’s what you need to do:
Choose an optimal location for mounting the fish finder. The placement of the fish finder unit is crucial for optimal performance and ease of use. It’s recommended to mount the fish finder within easy reach and view, preferably near your seating position. Consider the layout of your kayak and choose a location that provides a clear view of the display screen while being easily accessible.
Once you have chosen the mounting location, clean and dry the mounting area. It’s important to have a clean and dry surface to ensure a secure and stable installation. Remove any dirt, debris, or water from the mounting area before proceeding with the installation.
Ensure clearance for the transducer. The transducer should be mounted in a location that provides sufficient clearance and clear water flow. Avoid mounting the transducer in areas that may obstruct its performance, such as behind a rudder or in high turbulence areas. Take into consideration the shape and design of your kayak when determining the best location for the transducer.
By properly preparing your kayak, you can ensure a smooth and successful installation of your fish finder system.
Mounting the Fish Finder
Now that your kayak is prepared, it’s time to mount the fish finder. Here’s a step-by-step guide on how to do it:
-
Secure the mounting bracket to the chosen location. Use the appropriate mounting hardware to attach the mounting bracket to your kayak. Ensure that it is securely fastened and provides a stable base for the fish finder unit.
-
Attach the transducer to the mounting bracket. Depending on the mounting bracket and transducer design, you may need to use additional mounting hardware or brackets to secure the transducer to the mounting bracket. Follow the manufacturer’s instructions for proper attachment, ensuring that the transducer is securely and correctly positioned.
By following these steps, you can securely mount the fish finder on your kayak and ensure a stable and reliable installation.
Installing the Transducer
The transducer installation is a critical step in setting up your fish finder system. Here’s how to install the transducer on your kayak:
-
Drill the transducer hole. Choose an appropriate location for the transducer, taking into consideration the clearance and water flow requirements. Use a drill with the correct size bit to create a hole for the transducer. Follow the manufacturer’s instructions for recommended hole size and placement.
-
Seal the transducer hole. Apply a high-quality marine sealant around the edges of the transducer hole to prevent water from leaking into the kayak. Ensure a proper seal by smoothing the sealant with your finger or a tool. Allow the sealant to dry completely before moving on to the next step.
-
Mount the transducer. Attach the transducer to the transducer arm or mounting bracket, following the manufacturer’s instructions. Make sure the transducer is securely fastened and positioned correctly, pointing downwards towards the water.
By following these steps, you can install the transducer on your kayak and ensure a proper and effective fish finder system.
Wiring the Fish Finder
Proper wiring is essential for the fish finder system to function correctly. Here’s a guide on how to wire your fish finder:
-
Plan the wiring route. Determine the best route for the wiring, taking into consideration the location of the fish finder unit, transducer, and battery. It’s important to keep the wiring as neat and concealed as possible to prevent any interference or damage.
-
Connect the transducer to the fish finder unit. Use the appropriate connectors and wiring to connect the transducer to the fish finder unit. Follow the manufacturer’s instructions for proper connection and ensure a secure and reliable connection.
-
Connect the fish finder unit to the battery. Use the appropriate wiring and connectors to connect the fish finder unit to the battery. Make sure you connect the positive and negative terminals correctly to avoid any electrical issues. Double-check all connections to ensure a proper and secure connection.
-
Secure and conceal the wiring. Use zip ties or cable clips to secure the wiring along the kayak’s interior, keeping it tidy and out of the way. Avoid any areas that could potentially snag or damage the wiring. Conceal the wiring as much as possible to maintain a clean and organized look.
By following these steps, you can effectively wire your fish finder and ensure a proper and functional installation.
Testing and Calibrating
After completing the installation and wiring, it’s important to test and calibrate your fish finder system. Here’s what you need to do:
-
Power on the fish finder. Switch on the fish finder unit and ensure that it powers up properly. Check the display screen for any error messages or abnormal behavior.
-
Calibrate the fish finder. Follow the manufacturer’s instructions for calibrating the fish finder. This usually involves adjusting settings such as depth range, fish sensitivity, and display options. Calibrating the fish finder allows it to provide accurate and reliable readings.
-
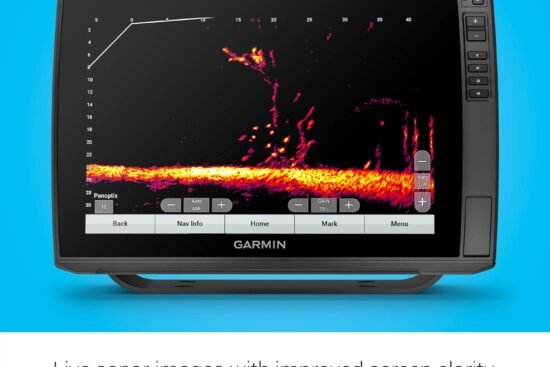
Test the sonar function. Lower the transducer into the water and test the sonar function of the fish finder. Ensure that it is detecting the bottom depth accurately and displaying any fish or underwater structures correctly. Make any necessary adjustments to the settings to optimize the sonar performance.
-
Adjust settings and sensitivity. Experiment with different settings and sensitivity levels to fine-tune the fish finder to your preferences and fishing conditions. This may involve adjusting the depth range, fish sensitivity, and other sonar settings. Take the time to familiarize yourself with the different options and features of your fish finder.
By testing and calibrating your fish finder, you can ensure that it is functioning properly and providing accurate and reliable readings on the water.
Troubleshooting Common Issues
Even with proper installation and calibration, you may encounter some common issues with your fish finder. Here are a few troubleshooting tips:
-
Interference and false readings. If you are experiencing interference or false readings on your fish finder, try adjusting the sensitivity or frequency settings. Additionally, move away from any sources of electrical interference, such as other electronic devices or trolling motors.
-
Loss of signal or connection. If you are losing the signal or connection between the fish finder and the transducer, check the wiring connections. Ensure that they are securely fastened and free from any damage. It’s also a good idea to check the battery connection and make sure it is providing sufficient power.
-
Poor transducer placement. If you are not getting accurate readings or are missing fish on the screen, the transducer placement may be the issue. Check that the transducer is properly mounted and positioned according to the manufacturer’s instructions. Avoid any obstructions or areas with excessive turbulence.
-
Battery drain. If you are experiencing excessive battery drain, make sure the fish finder is properly wired and connected. Check for any electrical issues or faulty wiring that could be draining the battery. It’s also a good idea to have a spare battery or a backup power source in case of emergencies.
By troubleshooting these common issues, you can identify and resolve any problems with your fish finder system and ensure smooth and uninterrupted fishing trips.
Tips for Kayak Fish Finder Installation
Here are some additional tips to make your kayak fish finder installation even easier:
-
Consider portable fish finders. If you frequently switch between kayaks or prefer a more versatile setup, consider using a portable fish finder. Portable fish finders often have suction cup mounts or brackets that allow for quick and easy installation and removal.
-
Use adhesive mounting pads for temporary installations. If you’re hesitant about drilling holes into your kayak or prefer a temporary installation, adhesive mounting pads can be a great solution. These sticky pads provide a secure and stable mounting surface without the need for drilling.
-
Keep wiring secure and tidy. Use zip ties or cable clips to secure the wiring along the kayak’s interior. This will help prevent any snagging or damage and keep the wiring neatly organized.
-
Regularly check and clean the transducer. It’s important to regularly inspect the transducer for any damage or debris that may affect its performance. Clean the transducer regularly to remove any algae or build-up that may hinder its ability to transmit and receive sonar signals.
-
Consult the user manual for specific instructions. Each fish finder model may have specific installation and operation instructions. Make sure to thoroughly read and follow the user manual provided by the manufacturer to ensure proper installation and operation.
By following these tips, you can make your kayak fish finder installation a breeze and enjoy the benefits of a reliable and effective fish finding system on your adventures.
Conclusion
Installing a fish finder on your kayak can greatly enhance your fishing experience by providing valuable information about underwater structures and the presence of fish. By carefully choosing the right fish finder, gathering the necessary tools and materials, and following a step-by-step installation process, you can successfully install a fish finder on your kayak.
Remember to consider the size of your kayak, decide on the type of fish finder, determine your budget, and check compatibility before making a purchase. Gather the necessary tools and materials, including the fish finder unit, transducer, battery and battery box, mounting hardware, wiring, and connectors.
Prepare your kayak by choosing an optimal location for mounting, cleaning and drying the mounting area, and ensuring clearance for the transducer. Secure the mounting bracket and attach the transducer to it.
Install the transducer by drilling the hole, sealing it, and mounting the transducer securely. Wire the fish finder by planning the wiring route, connecting the transducer to the fish finder unit, connecting the fish finder unit to the battery, and securing and concealing the wiring.
Test and calibrate the fish finder by turning it on, calibrating it, testing the sonar function, and adjusting settings and sensitivity. Troubleshoot common issues such as interference, loss of signal, poor transducer placement, and battery drain.
Consider using portable fish finders, adhesive mounting pads, and keep the wiring secure and tidy. Regularly check and clean the transducer, and consult the user manual for specific instructions.
By following these steps and tips, you can successfully install a fish finder on your kayak, improving your fishing success and enjoyment on the water. Happy fishing!